
Cheesecake Pinup Art (Nudity)


(Click on thumbnails for the full picture)
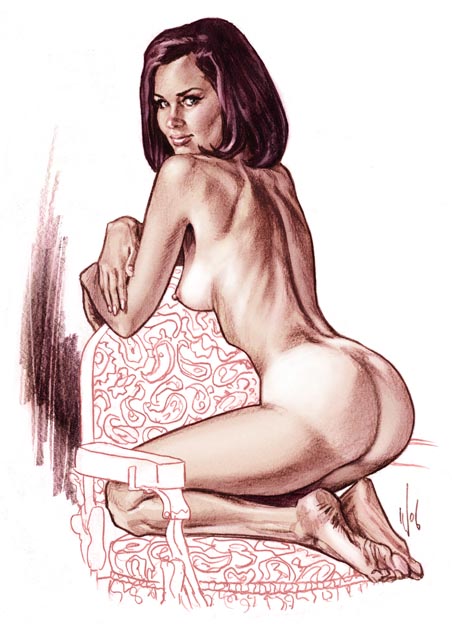
Here's some 'good girl art' from the past few years. The Betty Rubble was done as part of a series of cartoon cheesecake pinups for Australian Penthouse magazine. Unfortunately, for various reasons (other work commitments being the main one) I had to pull out from the project and it has since been continued by two other Aussie artists. The other two on the left and right were done as part of Drawing Board's monthly Drawing Jam.
posted by Chris Wahl at 11:00 PM
![]()
![]()

21 Comments:
Wow! They're hot! How did you color them?
*faint*
Maggie
beautiful figure work, very sexy, did you use photo reference or live models?
Geez!!! The best entries at the jams!!! That Kasumi it's wonderful
No wonder Barney Rubble has those weird eyes !! Superb piccy's !
Great Job Chris.... not only a fine job on the drawings.... but the colours are fantastic as well... the tan line on "Leslie" is perfect.... it really help capture the time the picture was taken.... anyways... good stuff.... PEACE!
J
Today Betty has finally won the battle for my fantasies against Jessica Rabbit.
You sir have the power to make cartoons dirty.
All 3 are fantastic bud.
Very sexy stuff, Chris. Betty is still my all time favourite by you, although I don't think I've seen the other 2 before until now.
I hope we get to see more cartoon cheesecake pinups from you in the future when you've got the time to work on them! :)
These are so good! Wow!!!
Thanks everyone! Always enjoy reading your comments.
Ben- The first drawing started with a shaded pencil sketch. To achieve the 60's pinup feel I blurred a copied layer of the pencils and set the layer to 'Vivid light', this increased the contrast of the shading and the blurring slightly softened the pencils. I then coloured it in Photoshop.
The second figure (Betty) started with only a clean outline drawing with all the shading done with the airbrush in Photoshop.
The third was a detailed pencil scanned and coloured in Photoshop, then the pencilwork was smoothed over in Painter to give a more painterly feel.
Maggie- heh, I thought you'd enjoy these.
Jert- Photo reference was used for the first and third. For Betty a 3D poser model was used as reference (mainly so I could control the pose and lighting setup). Also some photo reference was used from various sources to add that extra touch of realism.
Gary- Yeah you wouldn't have seen the first and third before. The first was only done last week, and the third was posted only in the Drawing Jam section about 5 months ago. Unlike Betty though, those are based on real models ( the first being a Playboy bunny from the 60's, the third is Masuimi Max a fetish model)
Chris, that midle one is awesome. is that painter? Howd you get it so clean and hand done looking?
Hey Craig! Good catching up with you at the recent convention. Also good to see you have your blog up and running.
As mentioned in my previous comment, Betty was done with scanned pencils and the Photoshop Airbrush. Painter was only used to blend the hair. Noise was added in Photoshop to reduce the smoothness of the airbrushing. I think this and the fact I used scanned pencils is what helps it look hand done.
Damn those are fine!
I love these compositions! great Betty
Thanks fellas!
BAMM-BAMM!!!!! ;)
That reminds me of a song...
'Whoa, black Betty (bam-ba-lam)" :)
Thanks again Greg!
This stuff is great!! thanks for your comments earlier, I just discovered your tutorials so I will soak what I can and learn vicariously through them. I will be doing some sci-fi pin up style works soon also, just to see how I go, this has definitely set the bar high.
Thanks Adam!
Hope the tutorials are of help.
Looking forward to see more work from you.
Hi Chris,
Found your blog from your posts on The Drawing Board. Thanks for sharing your process with the rest of us struggling artists. All three of these are nice, but the Betty really catches my eye, I guess I'm a sucker for idealized beauty! Can you talk a little more about the Poser model you created? posed? A screen shot of that would interesting...
Hi Jonathan.
Unfortunately, the Betty was completed a couple of years ago so I no longer have the Poser reference file, but I'll explain my process as best as I can.
Firstly, for those who don't know, Poser is 3D rendering computer software for posing, animating and rendering 3D human figures and animals. It's similar to a virtual photography studio where you can pose and light figures for reference.
The reason I chose to use Poser instead of finding a specific photo was control. I wanted a specific pose with specific lighting, and since hiring a real life model for reference wasn't an option, Poser was the next best thing. Saying that though, photo reference was gathered to use in conjunction with the Poser reference. The Poser model was only used as a basic starting point, as there are still a few things that Poser can't accurately replicate (the effects of gravity, distribution of weight, creases and wrinkles etc.)
For Poser, you can purchase custom characters (the default Poser figures are fairly crude. The Poser model used for this was Daz Studios' Victoria 2). I then posed the character, adjusted the body's parameters (you can adjust body shape, facial features and expression in Poser), and setup the lighting I wanted (which in this case was three-point lighting).
Then using the Poser and the photo reference gathered, I drew a pencil line drawing, which was then scanned and coloured (mainly using the airbrush tool) in Photoshop.
Let me know if you have any more questions or want me to clarify something.
Post a Comment
<< Home